“I’ve been to Seattle once. Let’s see, that must’ve been 1967.”
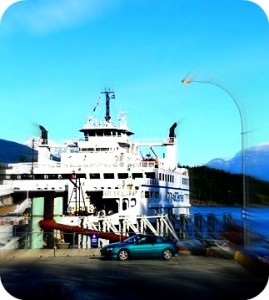
I was freezing cold, waiting for a drip coffee at one of the smallest ferry terminals I’d ever seen. The kind man speaking to me looked like a fisherman, and he was not cold. Unlike me in my leggings and thin jacket, he was dressed warmly for the unusually fierce arctic blast making its way down the Pacific Coast just days before Thanksgiving. American Thanksgiving, that is. I was in Canada.
It seems political boundaries still limit our travels. So do oceans, and the cost of airfare… But I have to tell you, crossing the border into Canada is pretty much a cinch. I thought back to our border crossing into British Columbia through Blaine just a few days before. After a 90-minute drive from Seattle, our actual crossing into Canada took all of 20 minutes, most of it waiting in line. We never had to exit our car, and were asked only a few simple questions about why we were traveling to Canada and when we would return. My husband and I showed our passports and our toddler’s birth certificate, and we were on our way. An hour later, just three hours after pulling out of our Seattle driveway, we were sipping wine in our Vancouver hotel room. A cinch, I tell ya.
And there we were, a few days later, midway through our weeklong roadtrip through British Columbia as we waited for the ferry crossing from Earls Cove to Saltery Bay. It’s the ferry crossing that separates BC’s Lower Sunshine Coast from its Upper Sunshine Coast, and it was our introduction to both of them. Earlier in the day, we’d passed through small town after small town, sampling the delicious local coffee and seafood along the way, and chatting with friendly locals wherever we found them. And, I must tell you, we were blown away by the sheer the volume of excellent-looking B&Bs all along the Sunshine Coast, most with rates that can only be characterized as wonderfully cheap.
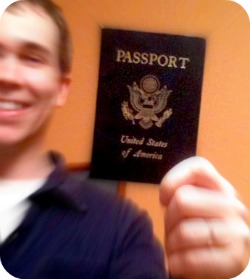 Somewhere around 34% of Americans and 41% of Canadians have a current passport, now required in order to cross the border into each others’ countries. I wonder what the percentage is for Washingtonians and Oregonians. With incredible Canadian destinations like Vancouver, Victoria, Vancouver Island, Whistler and the Sunshine Coast so very close and easy to get to, it seems a total shame to not have a passport.
Do you have a valid passport? I hope you do. But if you don’t, here’s what: Just get one. It’s really not that big of a deal. I’m going to tell you exactly how. And yeah, it’s not as cheap as it used to be, but it’s good for ten years. I mean, what else can you buy for $135 that lasts for ten years?
How to Get Your U.S. Passport
Step 1: Plan ahead! Unless you want to pay extra for expedited service, it’ll take about 4-6 weeks to receive your passport after you apply for it. So, if you have a trip planned, allow for those 4-6 weeks.
Step 2: Locate a nearby passport acceptance facility. You will need to apply in person if this will be your first passport, your previous passport is lost or damaged, or your previous passport was issued more than 15 years ago. This step seems to trip people up, but it’s quite easy. Click here, enter your zip code, and it’ll spit out a list for you of nearby offices, from post offices to neighborhood service centers. You can even search for facilities that can take your passport photo while you’re there. Note the facility’s passport acceptance hours – they may differ from the facility’s business hours.
Step 3: Gather stuff. You’ll need proof of citizenship. Acceptable documents to prove your citizenship include a certified birth certificate, a previously-issued passport, a naturalization certificate, or a certificate of citizenship. Got that? Great. You’ll also need to present your identification when you apply, such as your valid driver’s license, military ID or government ID. Next, you will need to bring payment. For a new passport, it’ll cost you a $110 application fee and a $25 execution fee, each paid separately, so don’t make the mistake of writing just one check for the whole amount ahead of time. The execution fee may be payable by credit card, but the application fee typically is not–you’ll need to pay by check or money order. (Cash accepted at some passport acceptance facilities).
Step 4: Photocopy your ID. Yep, you will need to present a photocopy of both the front and back of your ID, such as your driver’s license or military ID. Here are the requirements – the photocopy must be on plain white, 8.5 x 11 standard paper stock. Copy the front of your ID on one piece of paper, and the back of the ID on a separate sheet of paper. Okay, next.
Step 5: Get that passport photo taken. Many passport acceptance facilities will be able to take your passport photo when you show up to apply. If you want to check this off your list beforehand, see here for the list of photo requirements, and remember you’ll have to provide two identical photos. I advise getting them at a place that specializes in passport photos so that you have better assurance that your photos will meet the requirements. I recently got mine for my passport renewal at my local post office.
Step 6: Fill out form DS-11. You can fill it out online and print it, or print it first and fill it out by hand. Don’t have a printer? You can get the form at your nearby passport acceptance facility and fill it out on the spot. Take a sneak peak here first, though, so you know what to expect and what information to have with you, such as your social security number. Three notes. (1) This form will change on February 1, 2011. So if you are planning to apply for your passport after that date, hold off for the updated version of this form. (2) Don’t sign the form yet. You will need to sign the form in front of the person accepting your application when instructed to do so. (3) Don’t staple your photos to the form, even though it indicates you could.
Step 7: You’re almost there! Take all of this stuff with you to the passport acceptance facility you chose in Step 2, during their passport acceptance hours. They’ll take it from here, and you should be the proud owner of an official, valid U.S. passport in 4-6 weeks!
Need a passport in a hurry? Click here.
Are you Canadian and need a Canada passport? Try this.







One Response
We recently got our kids’ passports (anticipating several international trips, one including Vancouver), and though it’s not hard, as you say (and children’s are cheaper), I do wish they lasted as long as adults’ and didn’t expire after only 5 years.